

With all the scrapbooking and card making I do and dearly love, I forget that my roots has always been in all aspect of crafting... after all scrapbooking became popular once an everyday "crafter" started putting her memories on paper... I been hooked from the start on Scrapbooking ... but I do sometime want to do a project that requires getting my hands on floral fall flowers, picks and painting paper mache... I guess you can see where I going with this... so when the Design Team call come out from Craft Junkie Too I jumped at the chances to show off the other side of the Queen...
I was pleased to see I could still do some down to earth crafting and since I don't do well with flipping from one craft to another... I had too add my latest paper craft project that I been working on since I saw it done over at Karlee Crafts blog... Karlee did an adorable set of blocks on her blog. I just had to make my own version of them...
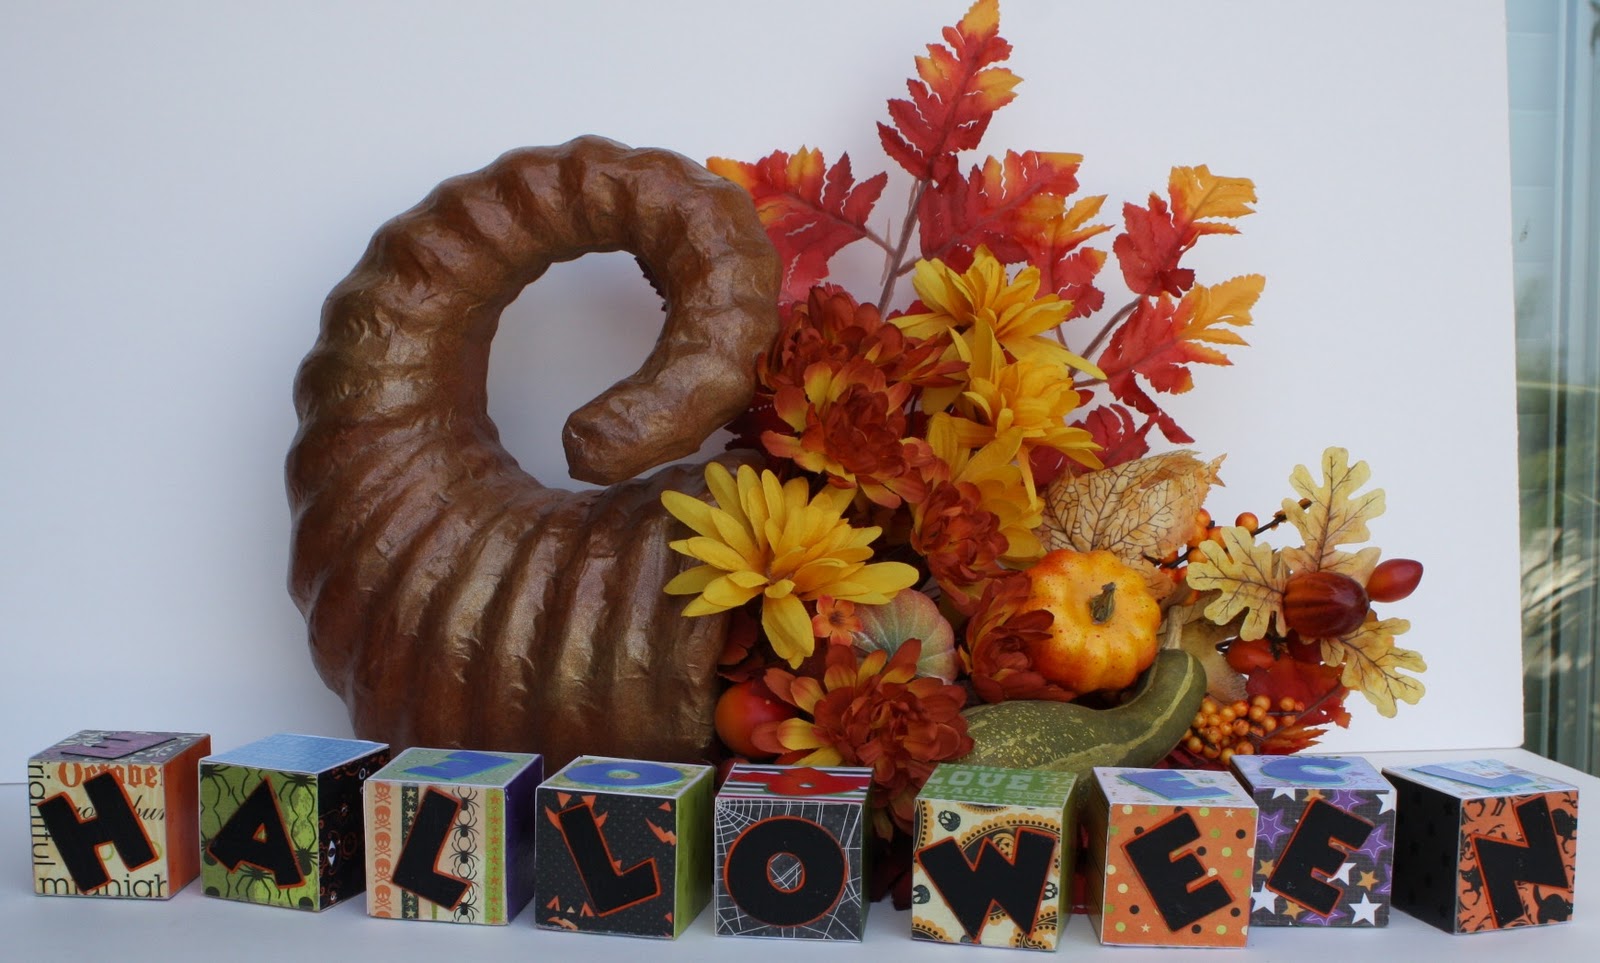
Love, Love, Love how they turned out... and if you flip them around they do spell other things... Which depending on your imagination could be just about anything...
Here what you need to make both of these Fall Projects...
Paper Mache Cornucopia
Floral Foam (Dry Green)
Design Master Spray Paints
Several Floral Stems Fall Leaves
Fall Flowers Several Tones
Several Gourds Variety of Sizes and Colors
Picks with Nut and Berries
Green Floral Wire
To make this Fall Center Piece all you need to do is spray your paper mache cornucopia with your design master paints
I used a darker color brown for base and high lighted it with a
spray of lighter beige running up the cornucopia tail...
Take your Green Floral Foam and place inside cornucopia about half way...
Then just start arranging your Fall Stems and Flowers as you please and make sure they fan out so once resting on your table,
add your picks with nuts and berries...
You'll have to use floral wire and insert into your dried or foam gourds and stick them into the foam in varies of places in your arrangement.
This will look perfect on your Thanksgiving Table...
Halloween Blocks Recipe
(9) wood blocks 2"
Several Fall Color Scrap Papers
Several Fall Color Scrap Papers
Black and Orange Card Stock
Cricut Micky Mouse Font 1.5 inches
Foam Brushes
Foam Brushes
MOD PODGE * Plaid *
Nail File or Sanding Block
The blocks are pretty easy to do just cut your paper just shy of 2 " ATWA, this will allow them to fit close to the corners on your blocks...
Paste them with Mod Podge let dry
Put your letters for spelling out your wording choices...
(Hint if you not the best Speller do spell check and map out your lettering...)
Re~apply Mod Podge over you lettering to seal them down...
Sand or file the paper over lays to take of extra paper.
I did 9 blocks and got the following
Halloween
Welcome
Christmas
The Queen
You can have blank space blocks to fill in the spaces between words just like...

Hope you enjoy my design project and don't forget catch the rest of the talented ladies who are part of the ...
11 comments:
I saw these blocks on Karlee's blog and I loved them too...great job!! Where did you find your blocks? I can't wait to do this project...tfs!!
I haven't done a block project yet but I am looking forward to it.
Wow, love the cornucopia! I also do several other crafts other than papercrafting! I love the blocks also! I just purchased mine and will be starting on a project soon.
Hugs!
CindyB
I also saw these blocks on Karlee's blog...I think the idea is so cute...trying to get my DH to cut some for me out of spare wood!
Good job Theresa, I watched Karlee's video on the blocks and I may just have to try it out as I do alot of decoupage too. Love your colors you chose for them. blanphear@yahoo.com
Blocks are fun~ great to add them with your other holiday decor!
I love love love these blocks.... you did a great job and it is so nice you have 4 different uses out of them!!!!
Lisa
lamerlisa@hotmail.com
http://lisakelly110803.blogspot.com/
Fabulous blocks! I love how you used all four sides!
Ruthie :)
Love your project Theresa - thanks for the addition to our Design Team.....love it! :)
♥Tracy
Great centerpiece! You did an awesome job on the blocks as well, love the colors!
wendy.roos2boys@gmail.com
What a great little display - I love it!
Post a Comment